

There's nothing wrong with using Proxmox or TrueNAS for your home server. They're excellent platforms that simplify a lot of complexity. But in this guide, we're going to build a fully functional home server from scratch using Fedora Server and Podman. No hypervisors, no pre-built NAS solutions—just a Linux box running containers. By the end, you'll have a solid foundation with proper storage, essential services, monitoring, and secure remote access.
Why Fedora Server?
Fedora Server is an excellent choice for a home server that balances stability with modern packages. Unlike the slow-moving enterprise distributions, Fedora gives you recent kernel versions, up-to-date software, and features that won't land in RHEL or CentOS for years. It's also the upstream for RHEL, so the skills you learn here translate directly to enterprise environments.
Fedora's defaults are sensible and security-focused out of the box. SELinux is enabled, firewalld is configured, and you get a clean, minimal installation to build on. The nine-month support cycle per release means you'll upgrade more often than with an LTS distribution, but you're always running modern, well-maintained software.
We're also using Podman instead of Docker. Podman is Red Hat's container engine and comes built into Fedora. It's daemonless, can run rootless for better security, and is command-compatible with Docker. If you know Docker, you already know Podman.
Hardware Considerations
For this build, I'm using:
- A system with enough RAM for container services (16GB minimum recommended, 32GB comfortable)
- A small SSD for the operating system (128GB-256GB is plenty)
- Two 4TB drives for data storage in a ZFS mirror
Your hardware will vary, but the principles remain the same. Separate your OS from your data, and always have some form of redundancy for anything you care about.
Part 1: Installing Fedora Server
Head to fedoraproject.org/server/download and grab the latest release. Flash it to a USB drive using Fedora Media Writer, Balena Etcher, Ventoy, or dd.
Boot from the USB and you'll be greeted by the Anaconda installer. It's a different experience from Debian-based installers, but straightforward once you understand the workflow.
Installation Destination
Click on "Installation Destination" to configure your disks. Select only your OS drive (the SSD), not your data drives—we'll handle those separately with ZFS.
The LVM Question
Fedora defaults to using LVM with XFS. You have a few options:
Pros of LVM (Fedora's default):
- Resize partitions on the fly without unmounting
- Create snapshots of your OS for easy rollbacks
- Span volumes across multiple disks if needed
- Standard tooling that works everywhere
Cons of LVM:
- Adds a layer of abstraction and complexity
- Slightly more difficult to recover data if something goes wrong
- Overkill for a simple OS drive
My recommendation: For your OS drive, the default LVM + XFS setup is fine. Fedora handles this well out of the box. If you prefer simplicity, you can select "Custom" and create a standard partition with ext4 or XFS instead. Since your data lives on ZFS anyway, the OS drive configuration matters less.
Note: Fedora's installer often only allocates 15GB to the root partition regardless of your drive size. We'll expand this after installation.
Other Settings
- Network & Host Name: Enable your network interface and set a meaningful hostname
- Root Account: Disable root login (recommended) or set a strong password
- User Creation: Create your admin user and check "Make this user administrator"
- Software Selection: Select "Fedora Server Edition" and make sure to include "Headless Management" which installs Cockpit—we'll use this for initial setup
Click "Begin Installation" and wait for it to complete.
Part 2: Post-Installation Setup
Reboot, remove the USB drive, and let's get into the system. Since we installed Cockpit during setup, we can do our initial configuration through a web browser before ever touching SSH.
Getting Into Cockpit
From another computer on your network, open a browser and navigate to:
https://your-server-ip:9090
You'll see a certificate warning since Cockpit uses a self-signed certificate by default—this is fine for local access. Accept the warning and you'll be greeted with a login screen. Use the credentials you created during installation.
A Quick Tour of Cockpit
Cockpit is Fedora's built-in web administration interface, and it's genuinely useful—not just a gimmick. Here's what you get out of the box:
- Overview: System health at a glance—CPU, memory, disk usage, and network activity
- Logs: Searchable journald logs without needing to remember
journalctlsyntax - Storage: Manage disks, partitions, and filesystems visually
- Networking: Configure interfaces, bonds, bridges, and firewall rules
- Accounts: Manage users and groups
- Services: Start, stop, and enable systemd services
- Terminal: A full shell right in your browser
That last one is key—we're going to use Cockpit's terminal to configure SSH access properly before we start using a regular terminal.
Setting Up SSH Key Authentication
Password authentication over SSH works, but key-based authentication is both more secure and more convenient. Let's set this up properly.
Step 1: Generate a Key Pair on Your Mac
Open Terminal on your Mac and generate an SSH key pair:
ssh-keygen -t ed25519 -C "your-email@example.com"
When prompted for a file location, press Enter to accept the default (~/.ssh/id_ed25519). You can add a passphrase for extra security or leave it empty for convenience.
This creates two files:
~/.ssh/id_ed25519- Your private key (never share this)~/.ssh/id_ed25519.pub- Your public key (this goes on the server)
Step 2: Copy Your Public Key
Display your public key:
cat ~/.ssh/id_ed25519.pub
Copy the entire output—it will look something like:
ssh-ed25519 AAAAC3NzaC1lZDI1NTE5AAAAI... your-email@example.com
Step 3: Add the Key to Your Server
Back in Cockpit, click on Terminal in the left sidebar. You now have a shell on your server.
Create the SSH directory and authorized_keys file:
mkdir -p ~/.ssh
chmod 700 ~/.ssh
nano ~/.ssh/authorized_keys
Paste your public key into the file, save, and exit (Ctrl+X, then Y, then Enter).
Set the correct permissions:
chmod 600 ~/.ssh/authorized_keys
Step 4: Test Key Authentication
Before we disable password login, let's verify the key works. On your Mac:
ssh your-username@your-server-ip
If everything is configured correctly, you should be logged in without being prompted for a password (unless you set a passphrase on your key, in which case you'll enter that instead).
Step 5: Disable Password Authentication
Now that key authentication works, let's disable password login for SSH to prevent brute-force attacks. Back in the Cockpit terminal:
sudo nano /etc/ssh/sshd_config.d/50-disable-password.conf
Add the following:
PasswordAuthentication no
Fedora uses a drop-in directory for SSH configuration, which is cleaner than editing the main config file.
Restart the SSH service:
sudo systemctl restart sshd
Step 6: Verify Password Login Is Disabled
From your Mac, try to force password authentication:
ssh -o PreferredAuthentications=password -o PubkeyAuthentication=no your-username@your-server-ip
You should see:
Permission denied (publickey,gssapi-keyex,gssapi-with-mic).
This confirms that password login is disabled and only key-based authentication works.
Expand the Root Partition
Fedora's installer often allocates only 15GB to the root partition, even if your drive is much larger. The rest sits unused in the LVM volume group. Let's fix that now before we fill up the disk installing packages.
Check current disk usage:
df -h /
If it shows something like 15GB total, expand it:
## Extend the logical volume to use all available space

sudo lvextend -l +100%FREE /dev/mapper/fedora-root

## Grow the XFS filesystem to fill the new space

sudo xfs_growfs /
Verify it worked:
df -h /
You should now see the full size of your drive available.
Update the System
Now let's update everything. You can do this from Cockpit's terminal or from your Mac over SSH:
sudo dnf upgrade -y
DNF Configuration (Optional)
Fedora uses DNF5 for package management. Its configuration lives at /etc/dnf/dnf.conf. View the current settings:
cat /etc/dnf/dnf.conf
By default it's minimal. To see all available options and their defaults:
man dnf.conf
Some common tweaks people add:
sudo nano /etc/dnf/dnf.conf
[main]
defaultyes=True
max_parallel_downloads=10
fastestmirror=True
keepcache=True
defaultyes=True- Already set by Fedora, makes "yes" the default for promptsmax_parallel_downloads=10- Download multiple packages simultaneously (default is 3)fastestmirror=True- Automatically select the fastest mirrorkeepcache=True- Keep downloaded packages in cache (useful if you reinstall often, but uses disk space)
Install Essential Packages
sudo dnf install -y \
    curl \
    wget \
    git \
    htop \
    net-tools \
    unzip \
    util-linux-user \
    nano
Set a Static IP (Optional)
Your server needs a consistent IP address so you can always find it on the network. You have two options: set a static IP on the server itself, or reserve an IP for the server in your router's DHCP settings. I usually prefer the latter—let the router handle it and keep the server on DHCP. But if you want to configure it on the server, here's how.
If you updated the system earlier, restart NetworkManager first to avoid version mismatch warnings:
sudo systemctl restart NetworkManager
Fedora uses NetworkManager for network configuration. Identify your connection:
nmcli connection show
Replace enp5s0 in the commands below with your actual connection name.
Option 1: Keep DHCP (recommended if your router handles reservations)
sudo nmcli connection modify enp5s0 \
    ipv4.method auto \
    ipv4.addresses "" \
    ipv4.gateway "" \
    ipv4.dns ""

sudo nmcli connection up enp5s0
Then set a DHCP reservation in your router for this server's MAC address.
Option 2: Set a static IP on the server
Replace the IP addresses below with values appropriate for your network:
sudo nmcli connection modify enp5s0 \
    ipv4.method manual \
    ipv4.addresses 10.173.10.180/24 \
    ipv4.gateway 10.173.10.1 \
    ipv4.dns 10.173.10.1

sudo nmcli connection up enp5s0
Verify the configuration:
ip addr show enp5s0
Configure the Firewall
Fedora uses firewalld instead of UFW. It's zone-based and integrates well with the rest of the system.
## Check current status

sudo firewall-cmd --state
sudo firewall-cmd --list-all

## SSH is allowed by default in the "FedoraServer" zone

## Add HTTP and HTTPS for web services

sudo firewall-cmd --permanent --add-service=http
sudo firewall-cmd --permanent --add-service=https

## Add custom ports we'll need

sudo firewall-cmd --permanent --add-service=cockpit  # Web management
sudo firewall-cmd --permanent --add-port=3001/tcp    # Open WebUI

## Reload to apply changes

sudo firewall-cmd --reload

## Verify

sudo firewall-cmd --list-all
Enable Automatic Updates
sudo dnf install -y dnf-automatic
Edit the configuration:
sudo nano /etc/dnf/automatic.conf
Set these values:
[commands]
upgrade_type = security
apply_updates = yes
Enable and start the timer:
sudo systemctl enable --now dnf-automatic.timer
Part 3: Setting Up ZFS Storage
ZFS isn't in Fedora's default repositories due to licensing concerns, but it's easy to add through the ZFS on Linux project.
Install ZFS
## Add the ZFS repository (using Fedora 42 package for compatibility)

sudo dnf install -y https://zfsonlinux.org/fedora/zfs-release-2-5.fc42.noarch.rpm

## Install kernel headers (must be installed before ZFS)

sudo dnf install -y kernel-devel-$(uname -r | awk -F'-' '{print $1}')

## Install ZFS

sudo dnf install -y zfs

## Load the ZFS kernel module

sudo modprobe zfs

## Enable automatic module loading on boot

echo zfs | sudo tee /etc/modules-load.d/zfs.conf
Verify ZFS is working:
zfs version
Identify Your Drives
lsblk
You'll see your drives listed. For this example, let's say they're /dev/sda and /dev/sdb. Always double-check you're not about to format your OS drive.
For more reliable identification, use disk IDs:
ls -la /dev/disk/by-id/
Prepare the Drives
WARNING: The following steps will destroy all data on these drives. Back up any data you want to keep before proceeding.
If your drives were previously used in a ZFS pool or have other filesystem signatures, you'll need to wipe them first. Otherwise, ZFS will refuse to create the pool or require force flags.
## Check for existing signatures

sudo wipefs /dev/sdb
sudo wipefs /dev/sdc

## Clear all signatures (THIS DESTROYS DATA)

sudo wipefs -a /dev/sdb
sudo wipefs -a /dev/sdc
If the drives were part of a previous ZFS pool, you may also need to clear the ZFS labels:
sudo zpool labelclear -f /dev/sdb
sudo zpool labelclear -f /dev/sdc
Create the Mirror Pool
sudo zpool create -m /data data mirror /dev/disk/by-id/... /dev/disk/by-id/...
This creates a pool named data mounted at /data. Replace /dev/sdb and /dev/sdc with your actual drive paths—use lsblk to identify them and make sure you're not formatting your OS drive.
Create Datasets
ZFS datasets are like folders with superpowers. Each can have its own compression, quota, and snapshot settings.
## Main data areas

sudo zfs create data/media
sudo zfs create data/backups
sudo zfs create data/documents

## Enable compression (LZ4 is fast and effective)

sudo zfs set compression=lz4 data
Your datasets are now available at /data/media, /data/backups, etc.
Verify Everything
zpool status
zfs list
You should see your healthy mirror pool and all datasets with compression enabled.
To view dataset properties:
## Show compression setting and ratio for all datasets

zfs get compression,compressratio

## Show all properties for a specific dataset

zfs get all data/media

## Show specific properties across all datasets

zfs get compression,atime,recordsize
Enable Auto-Import on Boot
Enable the ZFS services so your pool imports and mounts automatically after a reboot:
sudo systemctl enable zfs-import-cache.service
sudo systemctl enable zfs-import-scan.service
sudo systemctl enable zfs-mount.service
sudo systemctl enable zfs.target
If your pool doesn't mount automatically after a reboot, you can manually import and mount it:
## See available pools

sudo zpool import

## Import your pool

sudo zpool import data

## Mount all datasets

sudo zfs mount -a

## If you're already in /data, re-enter to see the mounted contents

cd && cd /data
Basic ZFS Maintenance
A few commands you'll want to know:
## Check pool health

sudo zpool status

## See space usage

zfs list

## Create a snapshot

sudo zfs snapshot data/media@before-upgrade

## Rollback to a snapshot

sudo zfs rollback data/media@before-upgrade

## Scrub the pool (do this monthly - checks for data corruption)

sudo zpool scrub data
Part 4: NVIDIA GPU Support (Optional)
If you have an NVIDIA GPU and want to use it for tasks like AI/ML workloads, video transcoding, or GPU-accelerated containers, you'll need to install the proprietary drivers.
Skip this section if you don't have an NVIDIA card or don't need GPU acceleration.
Install RPM Fusion Repositories
The NVIDIA drivers come from RPM Fusion, not Fedora's default repos:
sudo dnf install -y \
  https://download1.rpmfusion.org/free/fedora/rpmfusion-free-release-$(rpm -E %fedora).noarch.rpm \
  https://download1.rpmfusion.org/nonfree/fedora/rpmfusion-nonfree-release-$(rpm -E %fedora).noarch.rpm
Fix systemd Dependencies (Fedora 43)
Fedora 43 has a known issue where the NVIDIA packages conflict with systemd. Fix this first:
sudo dnf reinstall systemd systemd-udev --refresh
sudo dnf distro-sync --refresh --setopt=protected_packages=
Install the NVIDIA Driver
## Install kernel headers for module building

sudo dnf install -y kernel-devel kernel-headers gcc make dkms acpid

## Install the driver (akmod builds for your kernel)

sudo dnf install -y akmod-nvidia

## IMPORTANT: Wait for the kernel module to build

## This can take up to 5 minutes - don't reboot yet

sudo akmods --force
Verify the module was built successfully:
modinfo -F version nvidia
You should see a version number like 560.35.03. If you see "Module nvidia not found", wait a bit longer and run sudo akmods --force again.
Install CUDA Support (Optional)
If you need CUDA for compute workloads:
sudo dnf install -y xorg-x11-drv-nvidia-cuda
Blacklist Nouveau
The open-source Nouveau driver conflicts with NVIDIA's proprietary driver:
echo -e "blacklist nouveau\noptions nouveau modeset=0" | sudo tee /etc/modprobe.d/blacklist-nouveau.conf

## Rebuild initramfs

sudo dracut --force
Reboot and Verify
sudo reboot
After reboot, verify the driver is working:
nvidia-smi
You should see your GPU model, driver version, and CUDA version.
Part 5: Setting Up Podman
Podman is Fedora's native container engine and likely already installed. Unlike Docker, Podman is daemonless—each container runs as its own process. This means no single point of failure and better security, especially when running rootless.
Install Podman and Tools
sudo dnf install -y podman podman-compose cockpit-podman
This gives us:
- podman - The container engine itself
- podman-compose - Docker Compose compatibility for running multi-container stacks
- cockpit-podman - Web-based container management through Cockpit
Verify Installation
podman --version
podman info
Understanding Rootless vs Root Containers
Podman can run containers as your regular user (rootless) or as root. We'll use rootless containers, which is more secure—each container runs under your user account with no elevated privileges.
The only limitation is binding to ports below 1024 (like 80 or 443). If you need those, either use a reverse proxy on a high port, or allow unprivileged users to bind low ports:
sudo sysctl -w net.ipv4.ip_unprivileged_port_start=80
echo "net.ipv4.ip_unprivileged_port_start=80" | sudo tee /etc/sysctl.d/99-unprivileged-ports.conf
Enable Cockpit Podman Integration
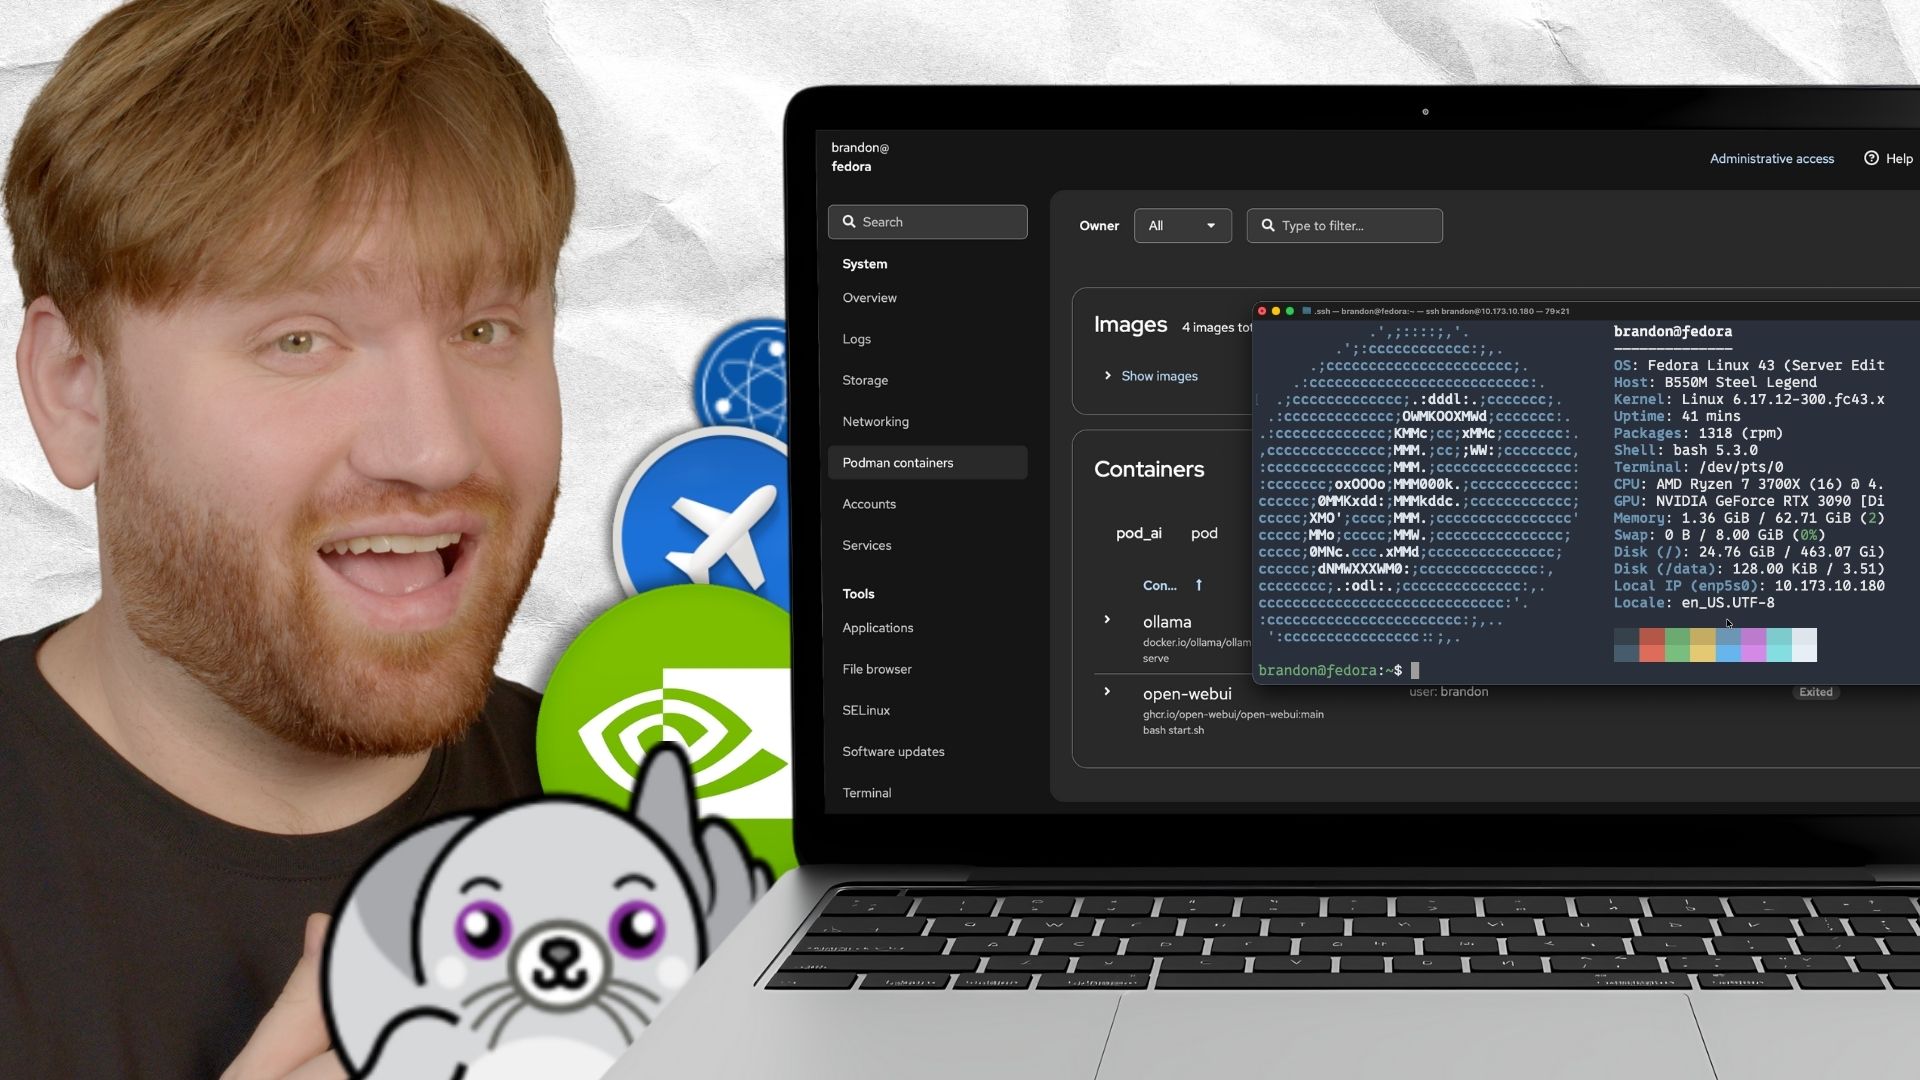
Since we installed cockpit-podman along with Podman, refresh your Cockpit browser tab and you'll see a new "Podman containers" section in the menu. This gives you a clean GUI for managing containers—viewing logs, starting, stopping, and inspecting container details.
Enable GPU Access for Podman (Optional)
If you installed NVIDIA drivers in Part 4, configure Podman to access the GPU.
Install the NVIDIA Container Toolkit:
## Add NVIDIA container toolkit repo

curl -s -L https://nvidia.github.io/libnvidia-container/stable/rpm/nvidia-container-toolkit.repo | \
  sudo tee /etc/yum.repos.d/nvidia-container-toolkit.repo

## Install the toolkit

sudo dnf install -y nvidia-container-toolkit

## Generate CDI (Container Device Interface) specification

sudo nvidia-ctk cdi generate --output=/etc/cdi/nvidia.yaml

## Verify CDI is configured

nvidia-ctk cdi list
You should see your GPU listed.
Test GPU access in a container:
podman run --rm --device nvidia.com/gpu=all docker.io/nvidia/cuda:11.0.3-base-ubuntu20.04 nvidia-smi
If this shows your GPU info, you're all set to run GPU-accelerated containers.
To give a container GPU access in a compose file, add the devices section:
services:
  my-gpu-app:
    image: docker.io/some-gpu-image:latest
    devices:
      - nvidia.com/gpu=all
Part 6: Spinning Up Your First Stack
Now let's deploy something useful. We'll set up Ollama with Open WebUI—a local AI chat interface that runs entirely on your server. If you set up NVIDIA GPU support in Part 4, this will use your GPU for fast inference. If not, it'll run on CPU (slower, but still functional with smaller models).
Create the Stack Directory
mkdir -p ~/podman/ai
cd ~/podman/ai
Create the Compose File
nano compose.yaml
With GPU support:
services:
  ollama:
    image: docker.io/ollama/ollama:latest
    container_name: ollama
    restart: unless-stopped
    volumes:
      - ollama-data:/root/.ollama:Z
    ports:
      - 11434:11434
    devices:
      - nvidia.com/gpu=all
    security_opt:
      - label:disable

  open-webui:
    image: ghcr.io/open-webui/open-webui:main
    container_name: open-webui
    restart: unless-stopped
    environment:
      - OLLAMA_BASE_URL=http://ollama:11434
    volumes:
      - open-webui-data:/app/backend/data:Z
    ports:
      - 3001:8080
    depends_on:
      - ollama

volumes:
  ollama-data:
  open-webui-data:
Without GPU (CPU only):
services:
  ollama:
    image: docker.io/ollama/ollama:latest
    container_name: ollama
    restart: unless-stopped
    volumes:
      - ollama-data:/root/.ollama:Z
    ports:
      - 11434:11434

  open-webui:
    image: ghcr.io/open-webui/open-webui:main
    container_name: open-webui
    restart: unless-stopped
    environment:
      - OLLAMA_BASE_URL=http://ollama:11434
    volumes:
      - open-webui-data:/app/backend/data:Z
    ports:
      - 3001:8080
    depends_on:
      - ollama

volumes:
  ollama-data:
  open-webui-data:
Open the Firewall
sudo firewall-cmd --permanent --add-port=3001/tcp
sudo firewall-cmd --reload
Start the Stack
podman-compose up -d
Watch the containers come up:
podman ps
Pull a Model
Ollama needs at least one model to chat with. Pull one now:
## For GPU - you can run larger models

podman exec -it ollama ollama pull llama3.2

## For CPU - stick with smaller models

podman exec -it ollama ollama pull phi3:mini
This downloads the model weights, which can take a few minutes depending on your connection.
Access Open WebUI
Open your browser and go to:
http://your-server-ip:3001
Create an account on first visit—this becomes your admin account. Then select your model from the dropdown and start chatting.
Verify GPU Is Being Used
If you set up GPU support, verify it's actually being used:
## In one terminal, watch GPU usage

watch -n 1 nvidia-smi

## In another, send a request to Ollama

podman exec -it ollama ollama run llama3.2 "Write a haiku about servers"
You should see GPU memory usage spike and the "GPU-Util" percentage increase.
Managing Models
## List installed models

podman exec -it ollama ollama list

## Pull another model

podman exec -it ollama ollama pull mistral

## Remove a model

podman exec -it ollama ollama rm phi3:mini
Popular models to try:
llama3.2- Meta's latest, good all-roundermistral- Fast and capablecodellama- Optimized for codephi3:mini- Small and fast, good for CPU
Part 7: Managing Containers
With Podman, you have several ways to manage your containers.
Command Line
Podman's CLI is nearly identical to Docker's:
## List running containers

podman ps

## List all containers including stopped

podman ps -a

## View logs

podman logs ollama

## Stop a container

podman stop open-webui

## Start a container

podman start open-webui

## Restart a container

podman restart ollama

## Pull updated images

podman pull docker.io/ollama/ollama:latest
Cockpit Web Interface
In Cockpit, navigate to "Podman containers" and you'll see all your running containers with options to start, stop, view logs, and inspect details. It's great for quick checks without needing to SSH in.
Updating Containers
To update a service:
cd ~/podman/ai
podman-compose pull
podman-compose up -d
Podman will pull new images and recreate containers that have updates.
Auto-Starting Containers at Boot
With restart: unless-stopped in your compose files, containers will restart after a reboot. However, you need to enable your user's Podman service to start at boot:
systemctl --user enable podman-restart.service
sudo loginctl enable-linger $USER
The enable-linger command allows your user services to run without being logged in.
Part 8: Remote Access with NetBird
At this point, you have a fully functional home server, but it's only accessible from your local network. Let's set up secure remote access using NetBird.
NetBird creates a WireGuard-based mesh network between your devices. Unlike opening ports on your router, your server remains invisible to the internet while still being accessible from anywhere you have the NetBird client installed.
Install NetBird on the Server
curl -fsSL https://pkgs.netbird.io/install.sh | sudo bash
Authenticate and Connect
sudo netbird up
This will give you a URL to open in your browser. Log in with your NetBird account (or create one), and authorize the device.
Install NetBird on Your Other Devices
Install the NetBird client on your laptop, phone, or any device you want to access your server from. Once connected to the same NetBird network, you can reach your server using its NetBird IP address from anywhere in the world.
The beauty of this approach is there's no port forwarding, no dynamic DNS, and no exposure to the public internet. Your server is only accessible to devices authenticated on your NetBird network.
Optional: Set Up DNS with NetBird
In your NetBird dashboard, you can configure DNS settings so that your devices resolve local hostnames. This means you can access grafana.home.lan even when you're on a coffee shop WiFi.
Where to Go From Here
You now have a solid foundation:
- Fedora Server with automatic security updates
- ZFS mirror pool protecting your data
- Podman with Cockpit for container management
- NVIDIA GPU support for accelerated workloads
- Ollama and Open WebUI for local AI
- Secure remote access via NetBird
Some natural next steps to consider:
- Reverse Proxy: Add Nginx Proxy Manager for clean URLs and SSL certificates
- Ad Blocking: Deploy Pi-hole for network-wide ad blocking
- Monitoring: Set up Prometheus and Grafana to monitor your server's health
- Backups: Configure Borgmatic or Restic to back up your ZFS datasets
- Media Server: Add Jellyfin or Plex for streaming your media collection
- File Sync: Deploy Nextcloud or Syncthing for file synchronization
- Home Automation: Run Home Assistant for smart home control
The best part about building your server this way is that you understand every layer. When something breaks at 2 AM, you won't be searching through forums trying to understand what TrueNAS or Proxmox is doing behind the scenes. You'll know exactly where to look.
What services are you planning to run on your home server? Let me know in the comments below.