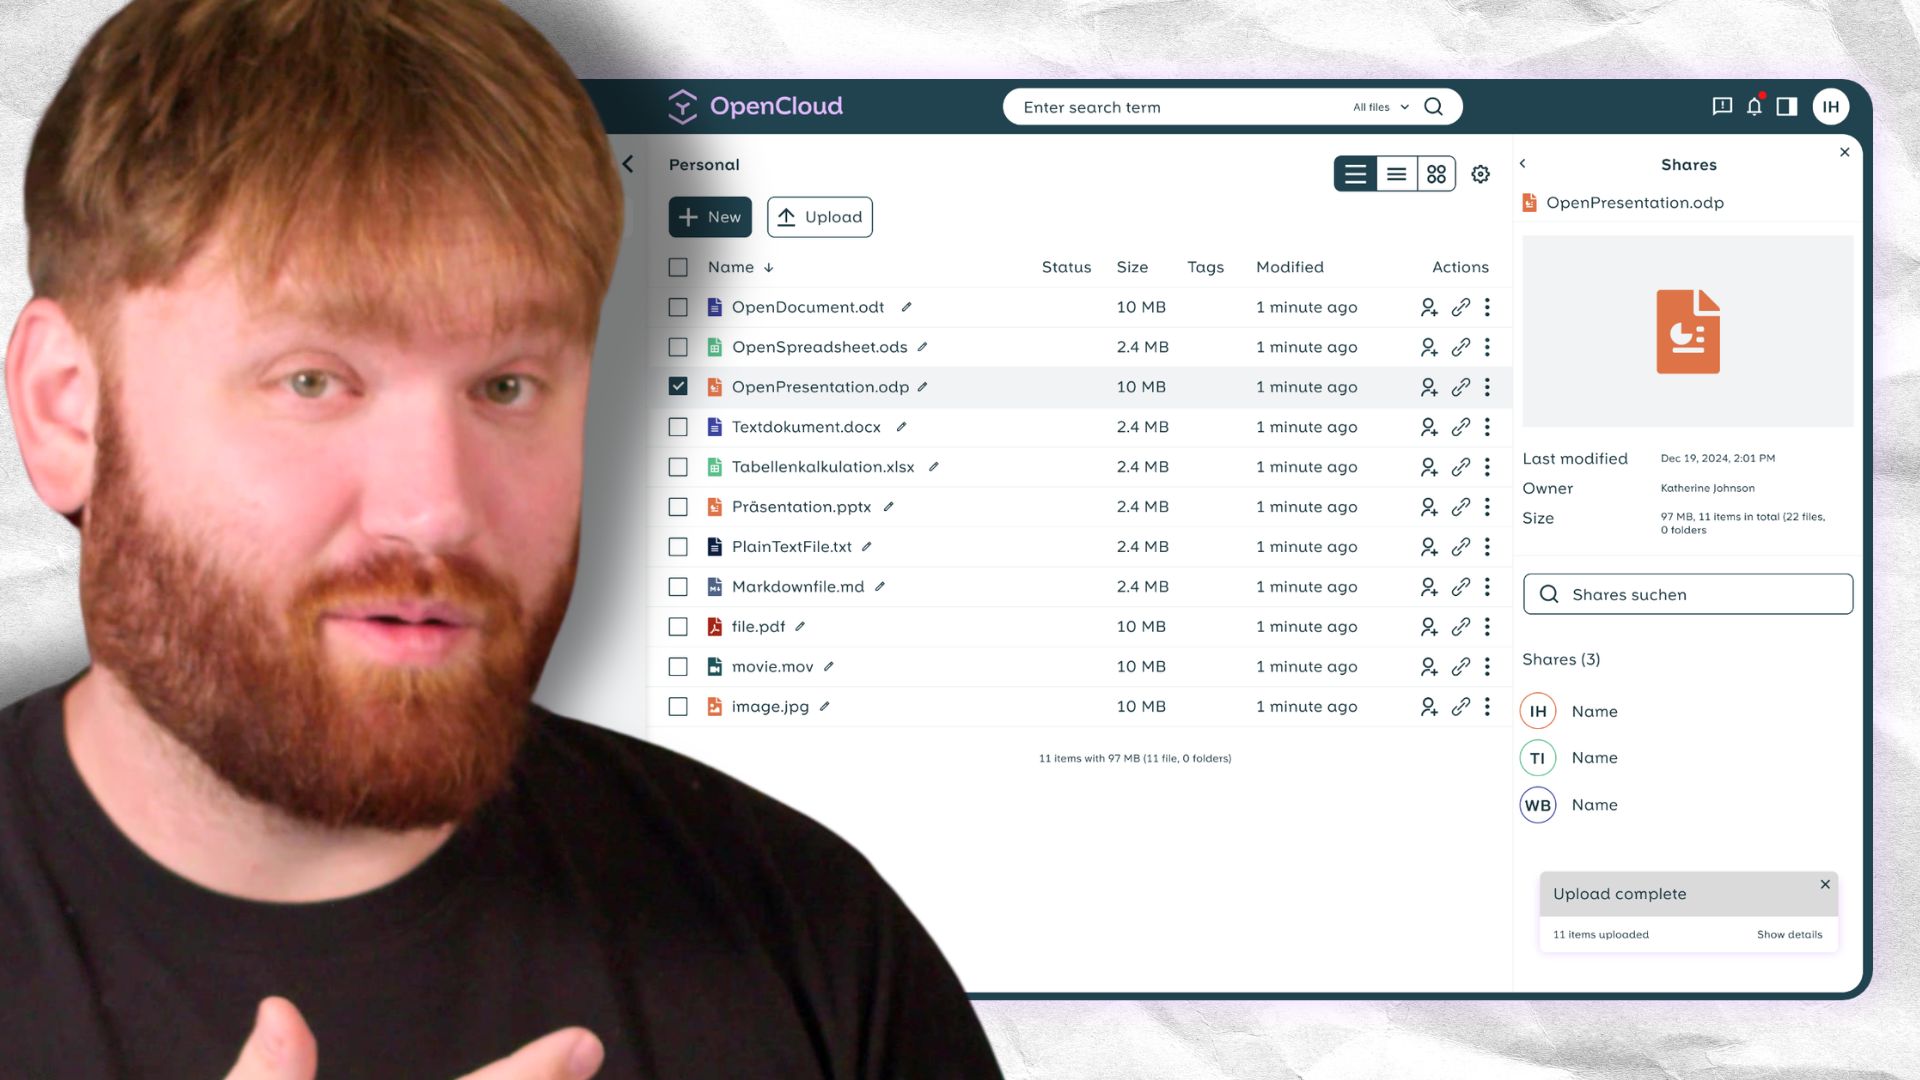


I'm going to be upfront with you right at the top here. I'm a Nextcloud guy. I've run it for years, I like it, and it does an absurd amount of stuff for something you can install on a mini PC sitting in your closet. But I'm always willing to test out the competition, and OpenCloud has been sitting on my list for a while now.
So let's set it up properly. Real domain, real certificates, files on local disk where you can get at them. First though, a quick word on what this thing is, because it's not just another Nextcloud clone.
If you already know why you want OpenCloud and just want to build it, skip straight to the installation.
Where OpenCloud Comes From
Both descend from ownCloud, but off completely different branches. Nextcloud is Frank Karlitschek's 2016 PHP fork of ownCloud Server, the one that grew into the full collaboration suite we all know today, and it's AGPLv3.
OpenCloud is the continuation of ownCloud Infinite Scale, the Go rewrite meant to replace that old PHP server entirely. When Kiteworks acquired ownCloud in late 2023 the core oCIS engineering team left, and in January 2025 they relaunched the project under the Heinlein Group in Berlin. The server is Apache 2.0, the clients are GPL, and there's no CLA. Pretty cool.
So these aren't two forks of the same codebase. One is a decade of PHP evolution, the other is a ground-up Go rewrite that happens to share ancestry.
What That Actually Means for You
Two of the biggest complaints you'll hear about Nextcloud are that it can feel bloated and that the PHP backend isn't always the most performant thing in the world. OpenCloud is written in Go and split into Go services, so it has the potential to be a lighter experience. I haven't benchmarked the two here though, so I'm not going to pretend one fresh install proves that either way.
The operational difference is easier to see. OpenCloud stores its data and metadata on the filesystem, so there is no separate database instance to maintain, no schema migrations to run, and no SQL dump to coordinate with your file backup.
The tradeoff is scope. Nextcloud has grown into a full collaboration suite with a massive app ecosystem. OpenCloud is much more focused on files, spaces, sharing, search, and optional document editing. If you want all the groupware features Nextcloud offers, OpenCloud is not a one-for-one replacement. If you want a simpler file server with document editing, it looks like a very interesting option.
This is my first time setting it up all the way through, so consider this a setup guide and an early comparison, not a long-term verdict. Let's build it.
What We're Building
Here's the target:
- OpenCloud running in Docker Compose with local filesystem storage on a path you control
- NGINX Proxy Manager out front handling the domain and the certificate
- Real Let's Encrypt certs, and no self-signed warnings on any of your devices
- No S3, no MinIO, no external database
That last point tripped me up at first, so let me clarify it. The compose repo has a storage/ folder, and people see that and assume they have to pick something. You don't. That folder contains exactly one file, decomposeds3.yml, and all it does is switch OpenCloud over to S3-backed storage. Leave it out and you get the default decomposed driver writing straight to local disk.
What You Need
- A server running Docker and Docker Compose v2
- A reverse proxy. I'm using NGINX Proxy Manager, and if you don't have one yet I've got a fallback below
- A domain you control, with access to its DNS
- Basic Docker comfort. You don't need to be an expert, but you should know what a compose file is
For this I'm using a Linux box, but the exact distribution and hardware aren't important. An Ubuntu Server VM, a bare metal mini PC, or another Linux machine will work. Your storage can be local, or it can be an SMB or NFS share that is already mounted on the host.
If you don't have NGINX Proxy Manager set up yet, I wrote a full guide to it over on my homelab repo. That covers the install, Cloudflare DDNS, and the part most people want, which is using a DNS challenge to get real Let's Encrypt wildcard certificates for services that never touch the public internet. I'd go do that first and come back, because everything below assumes it.
Do note that Compose v2 is not optional here. Some distro repos, Debian 12 "Bookworm" included, still ship the old Python docker-compose v1, and running this repo against v1 gives you a broken deployment with some very confusing errors. Install from the official Docker repos:
curl -fsSL https://get.docker.com | sh
Then verify what you got:
docker compose version
You want Docker Compose version v2.x.x. If that says command not found but docker-compose works, you're on v1 and you need to sort that out before going any further.
A Quick Note on HTTPS
You cannot run this over plain HTTP, and I want to explain why so you don't waste an afternoon on it.
OpenCloud's web UI authenticates over OIDC with PKCE, which needs the browser's Web Crypto API. Browsers only expose that in a secure context, and http://192.168.1.50 is not one. Only localhost gets that exemption. So login breaks before you get anywhere useful.
This is also why you can't just point a browser at the LAN IP and call it done. You need a hostname and a certificate, even for something that never leaves your network. That's exactly the problem the DNS challenge setup in my proxy guide solves, and it's why I'd rather send you there than have you fight self-signed certificate warnings on every phone in the house.
Step 1 - Clone the Repo
git clone https://github.com/opencloud-eu/opencloud-compose.git
cd opencloud-compose
Take a second and look around in there, because this repo is modular in a way I really like. docker-compose.yml is the core OpenCloud service, and everything else is an optional layer you stack on top using the COMPOSE_FILE variable.
external-proxy/is what we want, since NGINX Proxy Manager is doing the front-end worktraefik/is the built-in reverse proxy, for people who don't already have oneweboffice/is Collabora or Euro Officesearch/is Apache Tika for full text searchidm/is Keycloak and LDAP for real identity managementradicale/is calendars and contactsantivirus/is ClamAVstorage/is the S3 option we're deliberately skipping
You mix and match by listing files in COMPOSE_FILE, and later files override earlier ones. Pretty clean design, and it makes everything easy to reproduce later.
Step 2 - Create Your Local Storage Directories
Two directories, owned by the right user:
sudo mkdir -p /srv/opencloud/{config,data}
sudo chown -R 1000:1000 /srv/opencloud
Pretty simple. In a minute we'll go ahead and point OC_CONFIG_DIR and OC_DATA_DIR at these paths, and Compose bind mounts them straight into the container. Leave those two variables empty and you get Docker named volumes instead, which works fine, but then your data is buried in /var/lib/docker/volumes/ where it's harder to back up and harder to move to a bigger disk later.
That chown is not optional and it's the number one thing people trip over. The OpenCloud container runs as UID and GID 1000. If those directories are owned by root, the container starts, fails to write anything, and restart-loops forever while you stare at the logs trying to figure out what's wrong.
What ends up where:
configgets the generated config file with all your service secrets. It's tiny, but it's absolutely critical. Lose it and your instance is toast.datagets every file, all the metadata, and every space. This is the one that grows, so put it somewhere you have room.
Do note that this is OpenCloud's internal storage tree, not a normal folder of human-readable filenames that you should edit behind its back. Binding it to a path you control makes capacity planning and backups easier, but use OpenCloud or its clients to work with the files themselves.
Step 3 - Build Your .env File
cp .env.example .env
Now open .env in your editor. It's long, close to 500 lines, but it's mostly comments and about 90 percent of it doesn't apply to us. Here's what matters.
Tell Compose which files to load:
COMPOSE_FILE=docker-compose.yml:external-proxy/opencloud.yml
Core service plus the external proxy config, which exposes OpenCloud on port 9200 for NGINX Proxy Manager to forward to. Notice storage/decomposeds3.yml is not in that list. That's how we get local storage.
Setting this in .env means you can just run docker compose up -d from here on out instead of typing -f this -f that every single time. Much nicer, and it makes everything reproducible if you ever hand it off to Ansible.
Do note that external-proxy/opencloud.yml binds to 127.0.0.1:9200, so it only listens on localhost. If NGINX Proxy Manager runs on the same machine, that's perfect and you're done. If your proxy lives on a different box, like mine does, you'll want external-proxy/opencloud-exposed.yml instead, which binds to all interfaces:
COMPOSE_FILE=docker-compose.yml:external-proxy/opencloud-exposed.yml
That port is unauthenticated plain HTTP, so firewall it to your proxy's IP. Don't just throw it open and hope.
Your domain:
OC_DOMAIN=cloud.example.com
This has to match the domain you're going to put on the proxy host. It feeds OC_URL, which becomes the OIDC issuer, and if those two disagree your login will fail in a way that isn't obvious from the logs.
Your admin password:
INITIAL_ADMIN_PASSWORD=your-strong-password-here
Read this bit carefully because it's a real gotcha. This variable is only read on the very first startup. Once OpenCloud initializes, changing it in .env does absolutely nothing. And if you start the stack with it blank, the container will just restart-loop and you'll have to wipe the config directory and start over. So set it now, before the first up.
After first boot, you change the admin password through the OpenCloud settings UI or the CLI, not from this file.
Your storage paths:
OC_CONFIG_DIR=/srv/opencloud/config
OC_DATA_DIR=/srv/opencloud/data
Use absolute paths here.
And now the important one:
INSECURE=false
Go find line 8 of your .env. It says INSECURE=true and it is not commented out. That's there so the local development setup with self-signed certs works out of the box, which is reasonable enough, but since we're using a real certificate from NGINX Proxy Manager you want it off. The comment sitting right above it even tells you to comment the line out on an internet facing server, which is very easy to skim straight past. Change it.
A couple more worth setting:
DEMO_USERS=false
The demo users are alan, mary, margaret, dennis, and lynn, all with the password demo, all publicly documented. That is not something you want sitting on a running instance. It defaults to false, but go confirm it anyway.
Before moving on, the core settings in your .env should look like this. Use the -exposed proxy file only when NGINX Proxy Manager is on another machine:
COMPOSE_FILE=docker-compose.yml:external-proxy/opencloud.yml
OC_DOMAIN=cloud.example.com
INITIAL_ADMIN_PASSWORD=your-strong-password-here
OC_CONFIG_DIR=/srv/opencloud/config
OC_DATA_DIR=/srv/opencloud/data
INSECURE=false
DEMO_USERS=false
Now start it up:
docker compose up -d
docker compose logs -f opencloud
Press Ctrl+C when you're done watching the logs. That exits the log view; it does not stop OpenCloud.
Now check the first checkpoint:
docker compose ps
You should see the opencloud service with a status of Up. Nothing will be reachable through your domain yet, since we haven't pointed the proxy at it. That's next.
Step 4 - Set Up the Proxy Host
Over in NGINX Proxy Manager, go to Hosts > Add Proxy Host and fill it in:
- Domain Names:
cloud.example.com - Scheme:
http - Forward Hostname / IP: the IP of your OpenCloud host
- Forward Port:
9200 - Websockets Support: on
- Block Common Exploits: off
That last one isn't a mistake, and I need to call it out because it goes against my own advice.
In my proxy guide I say that I always enable Block Common Exploits, and for basically every other service that's good advice. Not here. With it on, the OpenCloud desktop sync client fails to authenticate with a 403, and there is nothing in the OpenCloud logs that will point you toward the proxy as the cause. The web UI works fine, which makes it even more confusing, because you'll swear the setup is correct.
So turn it off for this one host. I lost a chunk of an evening to that.
Then head to the SSL tab, pick your wildcard certificate, and enable Force SSL. If you followed my proxy guide you already have *.example.com sitting there from the DNS challenge, so there's no new certificate to request. That's the nice part about doing it that way, adding a service is just a new proxy host.
The Advanced Tab Settings You Actually Need
NGINX Proxy Manager's defaults are wrong for a file sync server, and this is the part most guides skip. Out of the box NPM ships with a 2GB upload cap and 90 second proxy timeouts, which is fine for a dashboard and completely wrong for something you're going to drag a video folder into.
WebDAV clients that don't support chunked uploads hold a single request open for the entire transfer, so a 90 second timeout means anything big just dies partway through. Go to the Advanced tab and drop this in:
client_max_body_size 0;
proxy_request_buffering off;
proxy_read_timeout 3600s;
proxy_send_timeout 3600s;
client_max_body_size 0 removes the upload cap entirely. proxy_request_buffering off matters more than you'd expect, because without it nginx writes the whole upload to its own disk before forwarding a single byte, which turns a 20GB upload into a 20GB write on whatever volume NPM is living on. And the timeouts give big transfers room to finish.
Save that, and you're good to go.
Before continuing, visit https://cloud.example.com. You should reach the OpenCloud sign-in page with a valid certificate, not a browser warning or a 502 error.
Step 5 - Log In and Verify Storage
Head to https://cloud.example.com.
- Username:
admin - Password: whatever you set in
INITIAL_ADMIN_PASSWORD
And just like that, we're in.
At this point you have the most basic version of OpenCloud accessible, with no extra features enabled. If all you need is file storage and sharing, this is already enough to start testing.
Go ahead and upload something, then confirm it is writing where you expect:
sudo ls -la /srv/opencloud/data
You should see the storage tree filling in. Would you look at that. Files on disk, no database anywhere in sight.
That is the end of the required installation. If you can sign in, upload and download a file, restart OpenCloud, and still open that file, the core deployment is working. Stop here if all you need is private file storage and sharing.
Step 6 - Know What a Normal Restart Looks Like
Even when everything works, tail the logs once so you know what healthy looks like:
docker compose logs -f opencloud
The first run does opencloud init, which generates all the internal service secrets and writes them into your config directory. On every start after that, the command fails harmlessly because the config already exists, and the entrypoint ignores the error and starts the server anyway.
So if you see an init error scroll by on restart number two, that's normal and by design. It threw me the first time.
Optional Extras
The base install gives you files, spaces, sharing, and filename search. In the video I add the two optional features I actually tested: full text search with Tika and document editing with Euro Office. The compose repo includes more, but you do not need any of it for the core file server.
Everything below is optional. Add and verify one feature at a time; you do not need any of it for the core file server.
These all work the same way. You append one more file to the COMPOSE_FILE line you already built, keep everything that's already on it, then run docker compose up -d to pick up the change. They stack, so two of them together looks like this:
COMPOSE_FILE=docker-compose.yml:external-proxy/opencloud.yml:search/tika.yml:radicale/radicale.yml
Whether that middle file is opencloud.yml or opencloud-exposed.yml depends on the choice you made earlier, so keep whichever one you're already running and don't swap it out.
Full Text Search with Tika
By default, search only looks at filenames. Apache Tika adds search inside your documents, so you can find that one PDF when you can't remember what you named it.
Add search/tika.yml to COMPOSE_FILE. Here are the complete values so you don't have to assemble them yourself.
If NGINX Proxy Manager is on the same machine:
COMPOSE_FILE=docker-compose.yml:search/tika.yml:external-proxy/opencloud.yml
If NGINX Proxy Manager is on another machine:
COMPOSE_FILE=docker-compose.yml:search/tika.yml:external-proxy/opencloud-exposed.yml
Pin Tika to the version tested with this OpenCloud release instead of using the floating latest tag:
TIKA_IMAGE=apache/tika:3.3.1.0
At the time of writing, apache/tika:latest can resolve to Tika 4.0.0. OpenCloud 7.5.0 will connect to it and send documents for extraction without an obvious error, but the extracted content may not become searchable. Tika 3.3.1 works correctly.
docker compose up -d --force-recreate tika opencloud
docker compose ps
In the video I used docker compose down followed by docker compose up so I could watch the complete startup in the foreground. The targeted recreation above gets the same configuration changes applied without taking unrelated services down.
Wait until Tika reports healthy. The compose file sets the extractor type, points OpenCloud at http://tika:9998, enables full-text search in the web interface, and makes OpenCloud wait for Tika during this recreation.
To check that it worked, upload a PDF or a .docx with some distinctive word buried inside it, something that isn't in the filename. Give it a few seconds, then search that word in OpenCloud. The file should come right back. And there we go, full text search.
Do note that indexing happens as files get uploaded or changed. Anything already sitting in your storage from before you enabled Tika won't have its contents indexed automatically. You can force OpenCloud to rescan every space with the current extractor configuration:
docker compose exec opencloud opencloud search index --all-spaces --force-rescan --insecure
That can take a while on a large library, but it saves you from opening and resaving every old document individually. Once it finishes, hard-refresh the browser before testing because the web app reads the full-text-search feature flag when it loads.
The base Tika image handles PDFs, Office docs, and plain text just fine. If you need OCR on scanned documents, use the matching apache/tika:3.3.1.0-full image, but most people won't. Tika does cost you some CPU on every upload since each file gets run through extraction, which is why it ships turned off.
Document Editing with Euro Office
OpenCloud gives you two options for editing documents in the browser, and you have to pick one since they both run through the same WOPI service. Collabora Online is the familiar option built on LibreOffice. The other is Euro Office, a fork of ONLYOFFICE, and that's the one I'm setting up here because I've already spent plenty of time with Collabora and wanted to try something new.
One of the potential benefits is where the work happens. Collabora handles much of the document processing on the server, while Euro Office puts more of it on the client. That could take some load off a smaller server, but I haven't used Euro Office long enough to validate the performance claims. Treat that as something to test on your own hardware, not a benchmark result from me.
Add a DNS record for euro-office.example.com, which your wildcard already covers. Then set the domain and use one of these complete Compose combinations.
EURO_OFFICE_DOMAIN=euro-office.example.com
EURO_OFFICE_JWT_SECRET=replace-this-with-a-long-random-secret
For NGINX Proxy Manager on the same machine:
COMPOSE_FILE=docker-compose.yml:weboffice/euro-office.yml:external-proxy/opencloud.yml:external-proxy/euro-office.yml
For NGINX Proxy Manager on another machine:
COMPOSE_FILE=docker-compose.yml:weboffice/euro-office.yml:external-proxy/opencloud-exposed.yml:external-proxy/euro-office-exposed.yml
If you already enabled Tika, keep search/tika.yml immediately after docker-compose.yml in either value. Use one OpenCloud proxy file and one Euro Office proxy file, not both variants for either service, because the plain and -exposed files publish the same container ports with different bind addresses.
docker compose up -d --force-recreate euro-office
docker compose ps
Then go add a second proxy host in NPM. Point euro-office.example.com at your host on port 9900, scheme http, websockets on, Block Common Exploits off again, then your wildcard cert and Force SSL on the SSL tab.
Wait until Euro Office reports healthy. Its healthcheck allows a 120 second start period and it can use most of that on a cold start, so don't panic when it initially says health: starting. Once it is healthy, recreate OpenCloud so collaboration discovery happens against the ready document server:
docker compose up -d --force-recreate opencloud
Now create a new .docx, type something, close it, reopen it, and confirm your edit was saved.
The JWT secret is passed into Euro Office and should be unique and difficult to guess. Set it before creating the container; don't leave the example value in place.
And because we used the -exposed overlay, port 9900 is bound on every interface of that box, not just localhost. Exact same rule as port 9200 earlier, so firewall it to your proxy's IP. Between those two, don't assume anything is guarding that document server for you.
Radicale for Calendars and Contacts
I did not enable this in the video, so this is a configuration pointer rather than a complete client walkthrough. The OpenCloud compose README has the current client URLs and integration details.
This is the partial answer to that scope gap I mentioned earlier. Append radicale/radicale.yml to your COMPOSE_FILE.
Every authenticated OpenCloud user gets a personal calendar and address book over CalDAV and CardDAV, which you can point Thunderbird or your phone at. If you're setting a data directory for it, the same ownership rule applies:
sudo mkdir -p /srv/radicale && sudo chown -R 1000:1000 /srv/radicale
RADICALE_DATA_DIR=/srv/radicale
It's real nice and I'm glad it's in there. It's also still not Nextcloud Calendar with shared team calendars and scheduling, so don't go in expecting that.
ClamAV Antivirus Scanning
I did not enable this in the video either. This is an optional configuration pointer, so verify the current memory and scanning settings in the compose README before enabling it on a production server.
If you're sharing upload links with people outside your household, scanning uploads is a reasonable idea. Append antivirus/clamav.yml to your COMPOSE_FILE, then set this as well:
START_ADDITIONAL_SERVICES="antivirus"
That second variable is really easy to miss, and without it the antivirus service just sits there doing nothing. If you're adding more than one extra service, comma separate them, like notifications,antivirus.
Heads up that ClamAV wants around 1GB of RAM for its signature database, which meaningfully changes the "runs great on low-power hardware" math. Worth it if you need it, skip it if you don't.
No Reverse Proxy Yet? Use the Built-In Traefik
If you're starting from a bare VPS with nothing on ports 80 and 443, the compose repo ships its own Traefik setup and it's the fastest path from zero to running. You don't need NGINX Proxy Manager at all.
Point a DNS A record at the server first, then:
COMPOSE_FILE=docker-compose.yml:traefik/opencloud.yml
OC_DOMAIN=cloud.example.com
TRAEFIK_ACME_MAIL=you@example.com
TRAEFIK_SERVICES_TLS_CONFIG="tls.certresolver=letsencrypt"
INSECURE=false
Traefik requests the certificate over the HTTP-01 challenge, which means ports 80 and 443 have to be reachable from the public internet. That's the tradeoff versus the DNS challenge approach.
One tip before you go live. Let's Encrypt rate limits are strict and they count failures, so test against staging first:
TRAEFIK_ACME_CASERVER=https://acme-staging-v02.api.letsencrypt.org/directory
Bring it up, visit the site, click through the warning, and check the certificate issuer. If it says "Fake LE Intermediate X1" the whole flow works. Then blank that variable, rm -f certs/acme.json, and recreate to get the real thing. That acme.json file is where Traefik stores your certificates and its ACME account key, so back it up with everything else.
I don't run it this way myself, but it works well and it's one less service to maintain if you've got nothing else running.
Backups, Which Is the Whole Point
Here's the payoff for setting it up with local storage.
The live OpenCloud application data in this setup lives in two directories:
/srv/opencloud/configfor the generated config and secrets/srv/opencloud/datafor all files and metadata
Back those up together, along with the opencloud-compose deployment directory containing your .env and any local configuration changes. There is no relational database to dump. If you went the Traefik route instead of NPM, make sure certs/acme.json is included too, so a restore doesn't leave you re-issuing certificates. Same goes for /srv/radicale if you turned on calendars and contacts, since that data sits outside the OpenCloud directories entirely. The simplest possible data copy looks like this:
docker compose stop opencloud
sudo rsync -aAX /srv/opencloud/ /mnt/backup/opencloud/
docker compose start opencloud
Stopping the container isn't strictly required, but it gives you a guaranteed clean state and it takes all of a few seconds.
If you want something better than an rsync to a spare drive, I've got a full Proxmox Backup Server guide that covers backing up Docker hosts with the PBS client and pushing a copy offsite. That's what I'd point you at for anything you care about.
Compare any of this to backing up Nextcloud, where you need the data directory, config.php, and a consistent database dump taken at the same logical moment, ideally with the instance in maintenance mode. Both are doable and both get scripted eventually. But one of them has a lot fewer ways to be subtly wrong six months later when you actually need the restore to work. That's not marketing copy, that's just what having no database gets you.
Updating
cd opencloud-compose
git pull
docker compose pull
docker compose up -d
The compose file pins a specific version, currently 7.5.0, so git pull is what moves you forward. I like that as a default, since you're not going to get surprise-upgraded because a latest tag moved under you overnight.
Take a snapshot before you upgrade anyway. And read the release notes, because OpenCloud is moving quickly, and a fast-moving young project is exactly where you want to know what changed before you find out the hard way.
The nice part is there are no schema migrations to sit through. New container, same data directory, back up in seconds.
Troubleshooting
The Desktop Client Can't Authenticate
Turn off Block Common Exploits on the proxy host. This is the number one issue and the web UI working fine will send you looking in all the wrong places.
The Container Keeps Restarting
Ninety percent of the time it's one of two things. Either INITIAL_ADMIN_PASSWORD wasn't set before the first boot, or your data directories aren't owned by 1000:1000. Check docker compose logs opencloud, then check ls -la /srv/opencloud.
Large Uploads Fail Partway Through
That's the NPM defaults. Add the client_max_body_size and timeout block to the Advanced tab.
502 Bad Gateway from the Proxy
The proxy can't reach port 9200. If OpenCloud and NPM are on different machines, you're probably still on external-proxy/opencloud.yml, which only binds to localhost. Switch to the exposed variant.
Also check that OpenCloud is actually running with docker compose ps and docker compose logs opencloud. A bad optional layer can make OpenCloud crash, and the proxy will show that as a 502. If you added Tika, look for errors around http://tika:9998; if you added Euro Office, make sure EURO_OFFICE_DOMAIN is set to the public hostname you routed to port 9900.
Login Redirects in a Loop or Fails Silently
OC_DOMAIN doesn't match the domain on the proxy host. The OIDC issuer is built from it, so those two have to agree exactly.
Everything Looks Fine but Files Won't Save
Check disk space, then check permissions on the data directory again. It's almost always permissions.
A DOCX Sometimes Says No Preview Is Available
First confirm Euro Office is healthy with docker compose ps. Avoid restarting the entire stack with docker compose restart: it starts OpenCloud, Tika, and Euro Office simultaneously, so OpenCloud can attempt discovery before its dependencies are ready.
For a deliberate restart, start Euro Office first, wait until it reports healthy, and then restart OpenCloud. If Tika is enabled, add tika to the first command too.
docker compose restart euro-office
docker compose ps
docker compose restart opencloud
Full Text Search Finds Filenames but Not PDF Contents
First, confirm TIKA_IMAGE=apache/tika:3.3.1.0 and make sure search/tika.yml is still present in COMPOSE_FILE, then run docker compose up -d --force-recreate tika opencloud. It is possible to have a healthy Tika container left over from an earlier deployment while the current OpenCloud container was recreated without the Tika overlay. In that state Tika is running, but OpenCloud does not have the extractor settings and will only search filenames.
Check the resolved services and the environment on the running OpenCloud container:
docker compose config --services
docker compose exec opencloud env | grep -E '^(SEARCH_EXTRACTOR|FRONTEND_FULL_TEXT)'
You should see tika in the service list along with SEARCH_EXTRACTOR_TYPE=tika, the Tika URL, and FRONTEND_FULL_TEXT_SEARCH_ENABLED=true. Once those are present, force a rescan so PDFs uploaded before Tika was enabled get their contents indexed:
docker compose exec opencloud opencloud search index --all-spaces --force-rescan --insecure
General debugging:
docker compose ps
docker compose logs -f opencloud
Final Thoughts
My first impression is good, but honestly, this is the first time I've set OpenCloud up all the way through. A successful install and a couple of document tests are not enough for me to tell you to replace a Nextcloud instance that already works.
What I can say right now is that the setup is pretty clean. The base file server works, full text search is finding content inside documents, and Euro Office gives us browser-based document editing. The lack of a separate database is also appealing from a maintenance standpoint.
The next step is the part that actually matters: grab the desktop clients, get everything synced, and use it for a while. I'm going to keep this instance dedicated to testing over the next few weeks. When I update my must-have homelab services video, you'll find out whether OpenCloud is still running or whether I went back to Nextcloud.
If you set this up, I'm really curious how it goes for you, especially with the desktop clients, so let me know in the comments on the video. If you're still building out the rest of your server, I've also got a full rundown of the homelab services I keep coming back to. With all that, I do hope this was useful, and I hope you have an absolutely beautiful day.